Animaze FAQ | Learn how to use Animaze by Facerig
Animaze Desktop: How can I import my own Live 2D avatar in the app?
Animaze support Live2D models created with the Live2D Cubism Editor version 3.0 or higher.
Live2D released Cubism 3.0 in Spring 2017, so if your model was created after 2017, it likely meets this requirement. If your model was created with a version of Live2D Cubism lower than 3.0, you need to load the model’s Live2D source files in the Live2D Cubism Editor v3.0 or higher and re-export the Live2D runtime files. If you want to take a deeper dive into the 2D avatar universe, we’ve prepared documentation for you here.
When it comes to importing your Live2D model into the Animaze app, the simplest way is through Animaze’s built-in Import Custom Avatars feature.
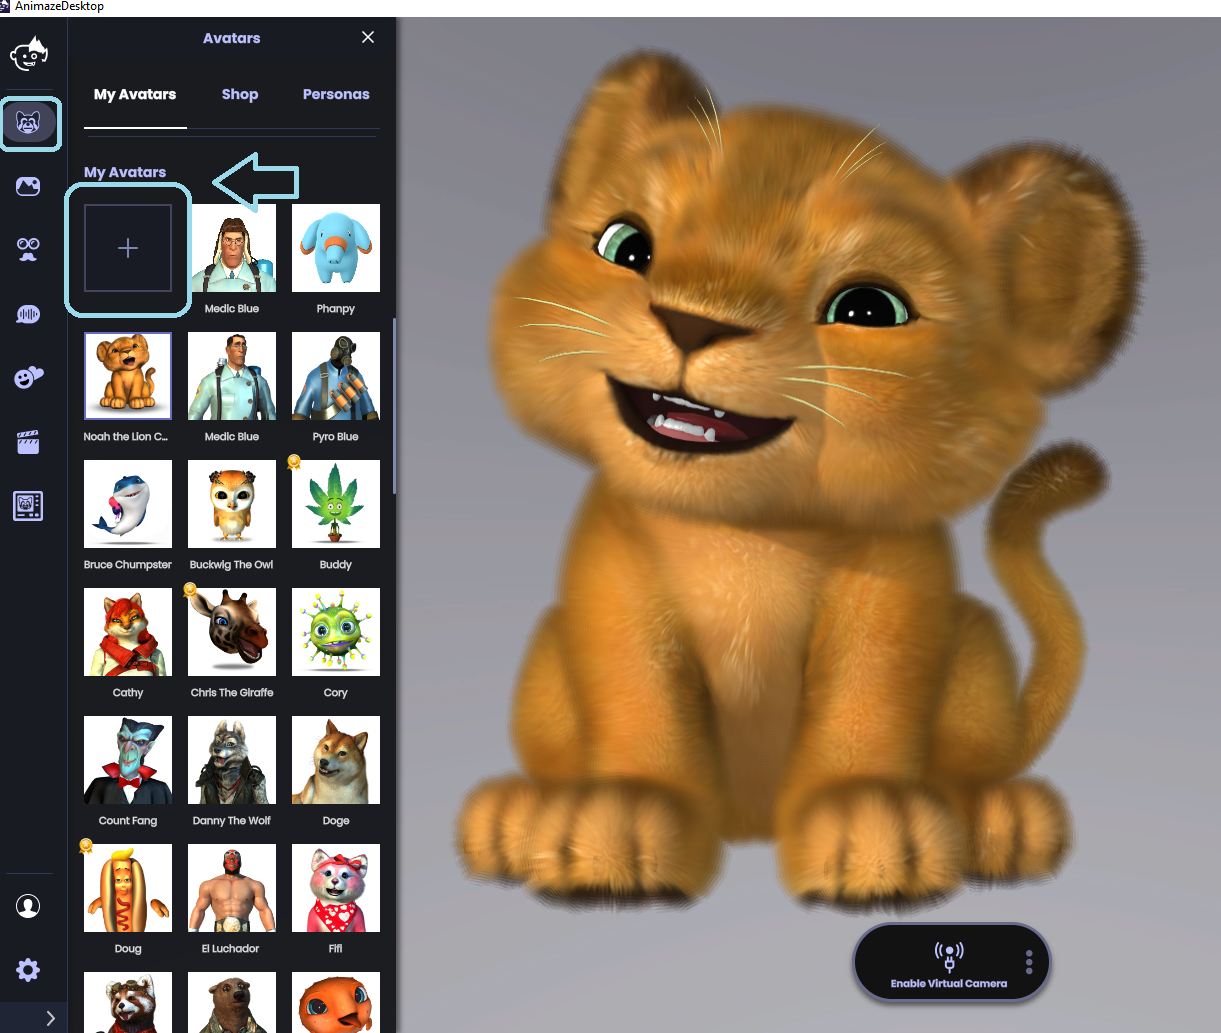
Open Animaze, click on the Avatar icon in the left menu bar, go to My Avatars and click on the + sign

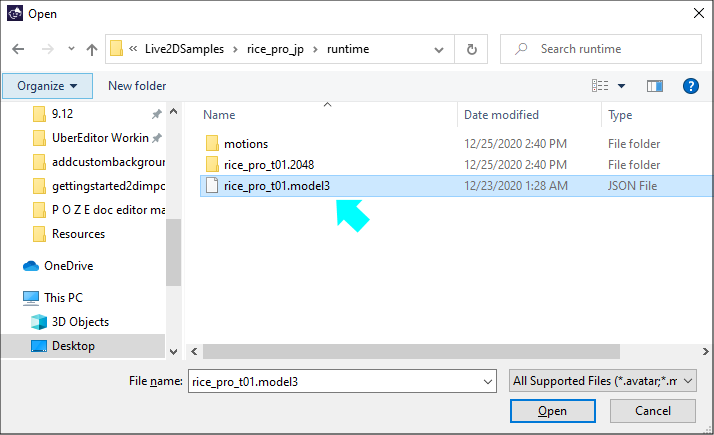
When the file browser opens, navigate to your Live2D model’s folder, select your avatar’s ‘model3.json’ file and click ‘open’

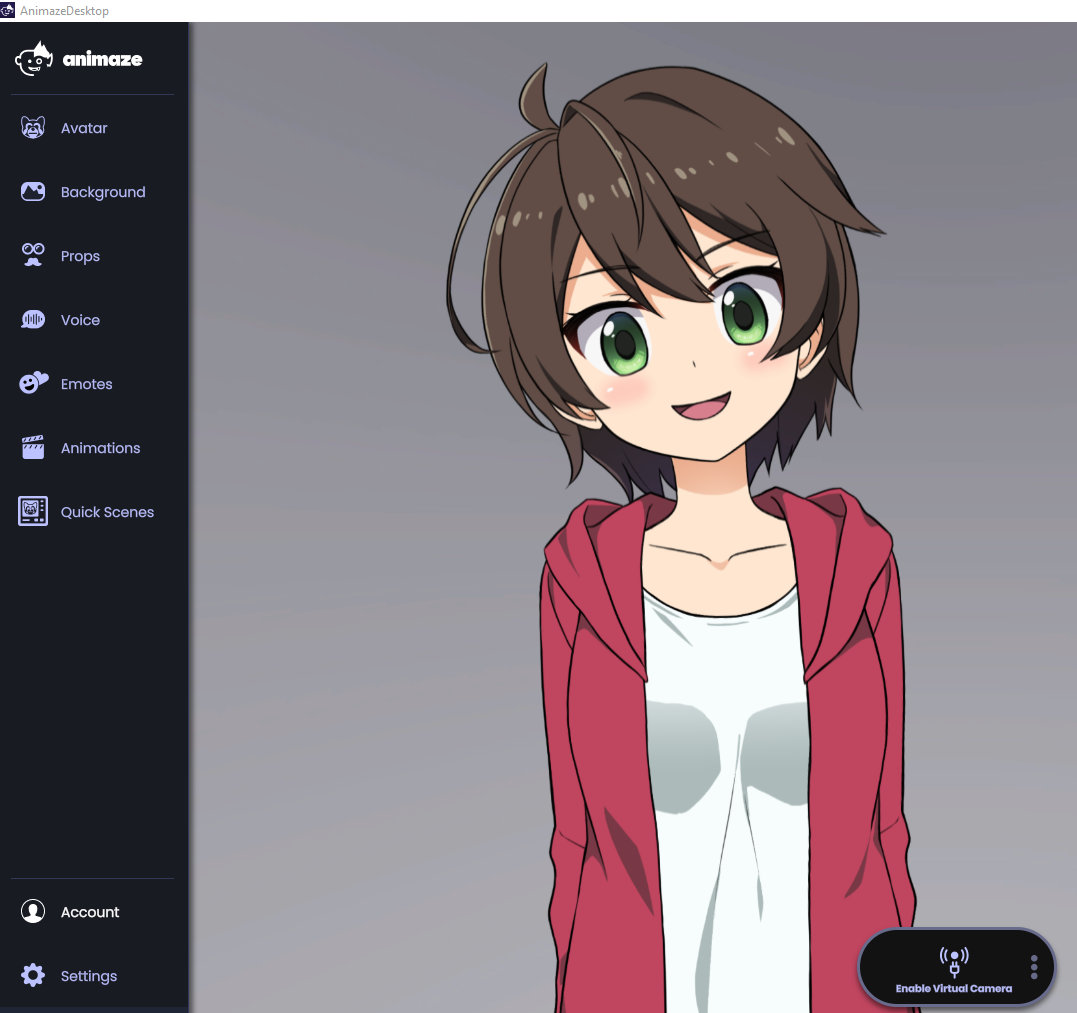
Your avatar will appear in Animaze!

Step 2: Test Your Avatar
In most cases, Animaze will automatically import your model’s motion parameters, special actions, and special poses. Make sure to test your avatar and ensure it is working as expected. If it does, you are all set, and don’t need to take any more action.
If You Need to Fix or Better Configure
If your avatar isn’t behaving as expected, you’ll need to import the avatar into the Animaze Editor. The two most common issues are the avatar looks blurry or low resolution and some face and body parts are not responding to tracking inputs.
Learn everything you need to know about Debugging Your Live2D Avatar here.
Also, if you need any help setting up your Live2D model, we’ve put together a list of Motion Parameters right here.
Here is what you need to do to import your 2D avatar through the Animaze Editor:
Throughout this guide, we will use a sample model called Hiyori, which you can download here, to get you started with the Animaze Editor. We selected Hiyori as the sample model because it is a full-body model that contains special actions and physics.
To import the Hiyori sample model, follow the steps below:
1. Download Hiyori’s archive using this link and extract the files inside.
2. Open the Animaze Editor, navigate to Assets, and select Import Live2D Avatar
![]()
3. Select the model’s .json file and click open
![]()
4. The following window prompts you to select the files you want to import. If this is your first time importing a specific model, make sure all the files are ticked before clicking Import.
![]()
5. An import log will be displayed after the Animaze Editor checks the files for errors and warnings. If everything is green, you are good to go. Click Ok to dismiss the log.
![]()
6. Once the avatar is imported, it will be displayed in the viewport.
![]()
Now that you have imported the sample model, to learn how to make your own Live2D model using the Cubism Editor follow the steps listed here.
