Textures
All the textures can be tested and customized in the Animaze Editor, in real-time (e.g. changing the diffuse texture, setting a tint color etc.). Throughout this chapter we will show you how to add components on your material and test them with Animaze Editor.
Animaze supports the following textures formats: .jpeg, .png & .tga, and they must be exported in the \Textures folder of the avatar. To keep transparency accuracy on the textures, we highly recommend to use the *.tga format. When importing the avatar in Animaze Editor, the system will compress them into .ktx files.
Diffuse
Applies diffuse color to the rendered surface based on a provided texture.
To have color on your avatar you need to create a diffuse texture that you can do by polypaint in programs such as Zbrush, Substance, Mari, Photoshop etc.
Requirements:
-
Diffuse texture – RGBA texture.
The diffuse texture holds diffuse color info of the rendered surface stored in RGB channels. |
Diffuse with alpha mask black = 0 transparency |
Alpha channel is used to specify transparency:
|
Diffuse with alpha mask white = 100% transparency |


If it has hue shift customization, then the textures have to be in mid tones (the middle part of a gradient, picture below). Else, the texture will look very light or burnt, relative to the lighting of the scene.


Gradient Gradient mid-tones
For a more efficient compression of the texture, use sRGB color space.

Tangent space Normal Mapping
Normal maps are a special kind of texture that allows you to add surface detail such as bumps, grooves, and scratches to a model which catch the light as if they are represented by real geometry.
Practically it is an illusion of details from high poly mesh with all the details transferred in a low polygon mesh.
See the pictures below:
Tangent space autodesk
 |
 |
 |
|
Normal Map Test |
LP Mesh without normal map |
Mesh with normal map |
To make a normal map you need the High polygon mesh containing all the details and the retopologized mesh (low poly model). For best results, we recommend baking the normal map in a software that is compatible with Autodesk (i.e. Mudbox, Maya, Substance).
For example in Maya:
|
Import the objects |
Low poly and High poly |
|
|
|
|


Also, you can find a lot of tutorials on the internet with different methods and programs.
Environment Mapping
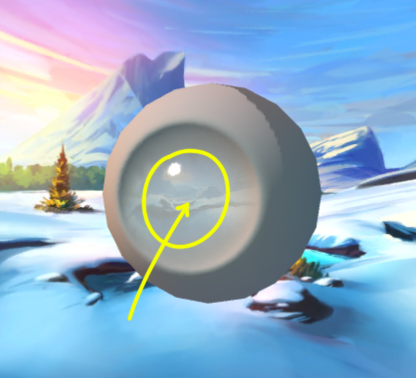
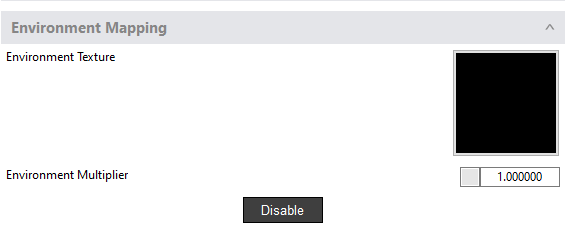
The AnimazeShader maps an environment cube texture (the Skybox) to the mesh surface. The Environment texture is provided by Animaze System, specifically the Skybox item cube texture.
Requirements:
|
|
|
|
|
Here are the steps to add this component to your material:
In Animaze Editor you have to select the mesh in Hierarchy Panel, then in the Editor panel in the right you can find the Add Component button, select Environment Mapping and click OK.

You can adjust the intensity in the multiplier tab. |
|
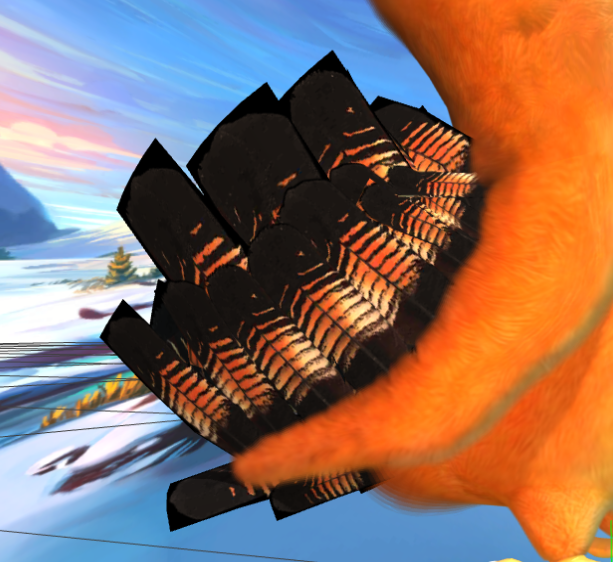
Alpha Test
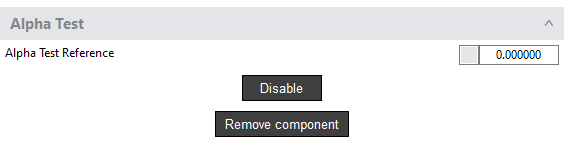
This component discards any pixels under a certain alpha value. Alpha test is done just after computing the diffuse color. It sets the transparency of objects.
In the example below, the owl's feathers (1st picture) have 0 transparency and rgb color is set on black (0), you can see the result of the alpha test in the second picture.
|
|
|
|
|
|


Requirements:
-
Alpha Test reference value – float value in Animaze Editor

Subsurface scattering – SSS
The Subsurface Scattering component simulates how the light diffuses or scatters in a skin-like surface. It is used in the shading of skin or skin-like materials in combination with Translucency component and Bekmann specular, to better approximate how light scatters, refracts and reflects on the surface.
Requirements:
-
scatter texture RGB:
|
Red channel - range of subsurface scattering
|
|
Green channel - direct light attenuation
|
|
Blue channel
A good default value would be 0.9 (229 229 229) for skin areas. Should fade towards 0 on mapping seams and on solid details such as piercings/jewelry. |
The UV maps must be unique within 0-1 range, and the materials mustn’t overlap.
Translucency
The translucency component simulates the light going through the shaded object. It is used in the shading of skin or skin-like materials in combination with Subsurface Scattering and Bekmann specular, to better approximate how light refracts, scatters and reflects on the surface.
Requirements:
|
|

Specular Mapping
The specular mapping is a component that can fine control the specular reflection on a rendered surface.
The higher the value of a pixel (from black to white), the shinier the surface will appear in the Animaze app. Therefore, surfaces such as dry stone or cotton fabric tend to have a very dark specular map, while surfaces like polished chrome or plastic tend to have lighter specular maps.
Requirements:
|
Specular Map texture – RGB texture. The specular map uses two channels to customize the specular behavior on the surfaces:
|
higher values make the shine small and sharp
|
lower values make the shine large and blurry |
|
0 means no specular shine
|
255 is max shine intensity |
|
Emissive – as part of Specular component Adds the emissive component to the surface shading. The Emissive just boosts up the diffuse color based on the specular map blue channel. Requirements: Specular Map Texture – RGB texture.
|
0 means no emissive |
255 is maximum emissive |


Beckmann Specular
The Animaze shader provides two types of specular highlight models: the classic Blinn-Phong distribution and the Beckmann distribution. The Beckmann specular is used in combination with Subsurface Scattering (SSS) and Translucency components, to better approximate how light refracts, scatters and reflects on the skin-like surfaces, but it is not limited to that.
Requirements:
-
Roughness - float value - a parameter between 0 and 1 measuring the surface roughness.
-
small values are shinier
-
larger values are rougher
SSS + Translucency |
|
Beckmann specular |
|


Specular Normal Mapping
An extra normal map to be used together with the regular one when computing reflection and specular, usually used for eyes meshes. |
|
The effect from the image above is made from normal map and specular normal map |
Normal map Specular normal map |


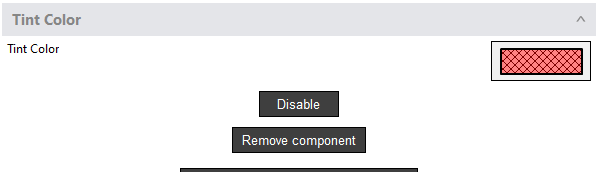
Tint color
Material component that tints the rendered surface with a certain color.
Requirements:
-
Tint Color RGBA:
-
RGB tints the surface
-
Alpha makes the surface transparent.
Add it by selecting Add Component in the Animaze Editor’s Hierarchy Panel, on the desired mesh > Tint Color > Ok. Further adjustments are available in the Editor.
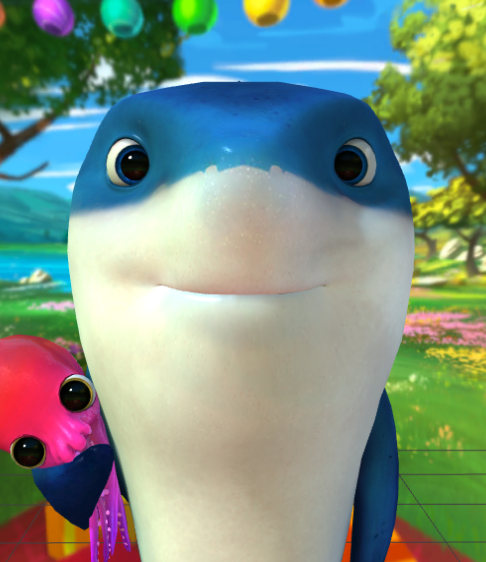
|
Without Tint |
With Tint |

Mouth AO
The AnimazeShader has a simple way to deal with the ambient occlusion of the mouth in all avatars. Based on some animation inputs, when closing the mouth, the light that affects the mouth interior is attenuated based on a monochrome occlusion texture map, and the effect is reduced when opening the mouth.
Requirements:
-
RGB texture:
|
Red channel - the texture holds the minimum brightness value in the red channel, for when the avatar’s mouth is closed. |
Baked AmbientOcclusion with mouth closed 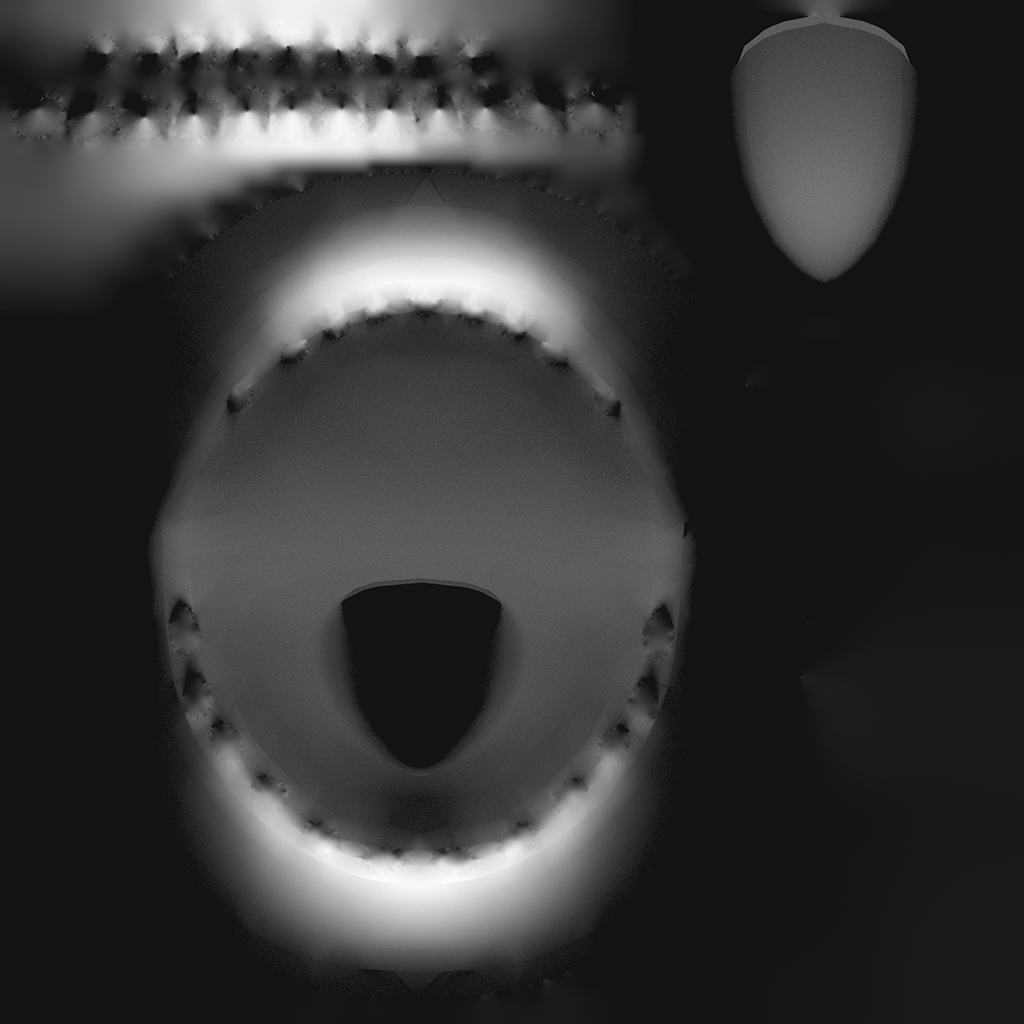 |
|
Green channel - reserved for mouth fully opened. |
Baked AmbientOcclusion with mouth open  |
|
Blue channel is used for the tongue. The tongue can dynamically travel from inside the mouth to outside the mouth so we need to mark what parts of the tongue need to be occluded less when the tongue sticks out. |
Baked AmbientOcclusion with mouth open and only the tongue information, without the rest of mouth interior. |

Fur Mask:
The Fur component renders the model in layers, creating the effect of a furry surface; it can be attained for short hair fur effects only. The component makes use of the normals and vertex color geometry info to compute a general fur direction, where the Red and Green channels give the direction in the Tangent and Binormal space.
Furthermore, a surface can have areas without any fur or with shorter fur. This aspect can be controlled using a fur texture mask.
The quality of the fur rendering also depends on the values of fur length, number of fur layers and a global fur direction multiplier.
Note! Fur rendering is expensive resource-wise as, in theory, the model is rendered several times (number of fur layers) per frame to create the effect. Performance-wise, lowering the mesh fur layers helps, although it causes a drop in quality.
Red channel controls the mix between normal specular and aniso specular:
|
|
Green channel is an additional layer alpha control. Alpha is the length, all lower value pixels are discarded, everything above will render at a calculated opacity, the green channel adds an additional transparency control. |
|
Blue channel is the fur aniso specular intensity |
|
Alpha channel is used as fur length, controlling a smoother blend between:
of the rendered surface. |
|


Skin dot mapping
Dot mapping (or dot gradient-mapping) is used as a fast skin shading approximation solution, that is cheap resource-wise.
Requirements:
Note! The texture sampling needs to be set to Clamped. The U axis in texture space is computed from the dot product of the surface normal and the incoming light direction. |
|
|
Clamping the texture will prevent wrapping artifacts; when mapping a texture onto an object and you don't want the texture to tile. UV coordinates will be clamped to the range 0-1. When UVs are larger than 1 or smaller than 0, the last pixel at the border will be used.
Animated texture
The animated texture component takes the diffuse and runs a frame by frame animation based on a tiling method.
Requirements:
-
diffuse texture RGBA
-
(*) number of rows and columns in the diffuse texture
-
(*) framerate

Animated Alpha Noise
The Animated Alpha Noise component adds an alpha animation for some effects.
Requirements:
-
needs a RGBA noise texture
-
a set of noise parameters set from Animaze Editor.
Cel Shading
Cel-shading, or “toon shading”, is an intentional non-photorealistic rendering which is generally used to make 3d graphic content appear with flat colors.
A common theme of cel-shading which gives it that effective cartoon animation look is the use of bold outlines. |
|

Cel shading is supported by two separate material components, the main difference being the amount of fine-tuning and detail control needed for a particular look:
-
Dual-tone cel-shading that has a set of parameters to control Diffuse intensity, Specular highlights, and Edges.
-
Multi-tone cel-shading that uses textures to control Diffuse intensity, Specular Highlights, and Edges in far more fine detail.
Edge outline
The Animaze shader implements two outline methods that can be used simultaneously:
-
Dot based edge detection - the edges of the same surface are darkened. This method uses the dot product between the surface normal and light direction and decides based on a threshold if a pixel is on the outline of the rendered mesh or not.
-
Expanded shell / Outline shell - the darkened outline is rendered on the exterior of the surface
Currently, both outline methods render a darkened outline, there is no support for tinted outlines.
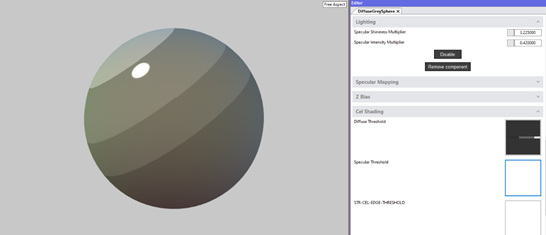
Cel shading (no textures) - Dual Tone Cel Shading
-
It can be added in Animaze Editor as mesh component

Diffuse Threshold - light intensity threshold that decides between applying 1st and 2nd tone diffuse intensities.

Diffuse minimum value - 1st tone diffuse intensity value

Diffuse maximum value - 2nd tone diffuse intensity value

Specular Threshold - light intensity threshold that decides between applying 1st and 2nd tone specular intensities.

Specular minimum value - 1st tone specular intensity value

Specular maximum value - 2nd tone specular intensity value.

Edge Threshold - threshold used by the dot-based edge detection method.
Edge minimum value - the intensity of the surface that is not the edge (factorizes the diffuse and specular tones).

Edge maximum value - the intensity of the surface that is on the edge (factorizes the diffuse and specular tones).

Edge outline width - used by the expanded shell/outline shell method. Controls the size of the outline. Currently, the edge is always black.

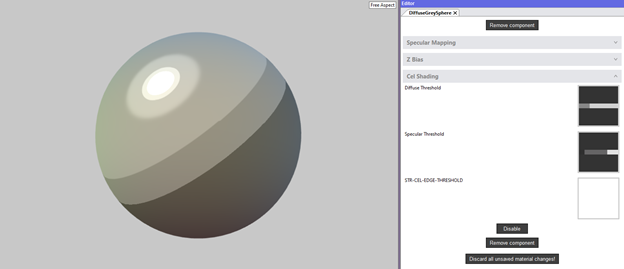
Cel shading w/ texture - Multi-tone cel-shading
Multi-tone cel-shading enables a finer detail of the rendered surface through use of various textures, that control the intensities of the diffuse, specular tone, and dot-based edge detection.
Diffuse Tones Texture
-
The grayscale texture that maps light intensity (u coordinate) to diffuse tone intensity (texel color).
Texture used

Texture used

-
Animaze shader samples a single row, so the size of the texture can be width x 1 pixel
-
Supports fine details by choosing to build the texture with steps or gradients
Texture used
Texture used

For maximum cel-shading effect make sure to use point filtering on texture (by default Animaze imports textures with linear filtering).

Specular Tones Texture
The grayscale texture that maps light intensity (u coordinate) to specular highlight tone intensity (texel color).

-
Animaze shader samples a single row, so the size of the texture can be width x 1 pixel
-
Supports fine details by choosing to build the texture with steps or gradients
Texture used
Texture used

For maximum cel-shading effect make sure to use point filtering on texture (by default Animaze imports textures with linear filtering).

Edge Tones Texture - used for the dot-based edge detection
The grayscale texture that maps the dot product between surface normal and light direction (U coordinate) to edge tone intensity (texel color).
Texture used

-
Animaze shader samples a single row, so the size of the texture can be width x 1 pixel
-
Supports fine details by choosing to build the texture with steps or gradients
Texture used

Texture used

For maximum cel-shading effect make sure to use point filtering on texture (by default Animaze imports textures with linear filtering).
Edge outline width - used by the expanded shell/outline shell method. Controls the size of the outline. Currently, the edge is always black
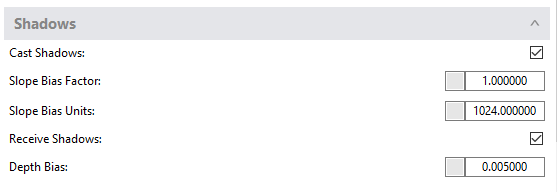
Shadows
Animaze rendered surfaces can cast and receive shadows, both processes being independent from each other.
Casting shadows makes the rendered surface be rendered through a shadow pass, building up a shadow map. Receiving shadows makes the Animaze Shader map the already rendered shadow map.
All three numerical values are used to get rid of the shadow mapping artifacts.
Slope bias factor - scale factor that is used to create a variable depth offset for each polygon when rendering the shadow map
Slope bias units - constant depth offset when rendering the shadow map;
Depth bias - screen space value that is used to offset the object depth before comparing it to the shadow map value.
Additional components can be added to a selected mesh within the Animaze Editor:
|
Static Color – a color component which overrides any other color texture on that mesh; usually useful for particle systems. |
|
|
Texture Alterator – basically, a gradient color mask used for dilation of the pupil which can be fed by animation data. In order to attain this, you must have a unique mapping for the eye, placed in its center. The mask with full intensity (white) must have the size of the pupil, while the gradient from white to black must have the size of the iris. |
|

You can test the textures you created in Animaze Editor, but you’ll need at least a basic rig with BipRoot, BipHead, Camera bones and idle1 animation.
To test your textures in the editor do the following:
Phase 1:
|
|
|
 |
Phase 2:
|
|
|
|
|
Phase 3:
|
|
|
|
|
|


Seams Problem
If you have visible seams on your avatar, you can use the “clone stamp” tool in Mudbox software in the seams area to make a bleed border.
|
|

There are many solutions to this issue in other programs as well, so use the one you find best to solve the problem. For example, we are using the Flaming Pear plugin in PS.
When you are happy with the result you can start the next step.
Customizations (colors & animations)
-
Color customizations - Animaze supports 2 types of color customizations:
-
Color Customization allows you an exact control over the color, but there is no variation.
-
Hue Shift Customization will let you keep more details and variation.
1.1. Color Customizations are made from 2 textures: Customization mask and Saturated Diffuse texture
For example, you want to customise this Crown Prop |
|
