Create a simple, static 2D background with an overlay
The base Background image.
Step1: Open the Animaze Editor through Steam.
- Go to Steam > Library
- At the top of your game list there is a drop-down list (usually, it is set to GAMES)
- Click on the drop-down list and select TOOLS
- Scroll through the left side list and click on Animaze Editor
- Launch it as you would launch any Steam title.
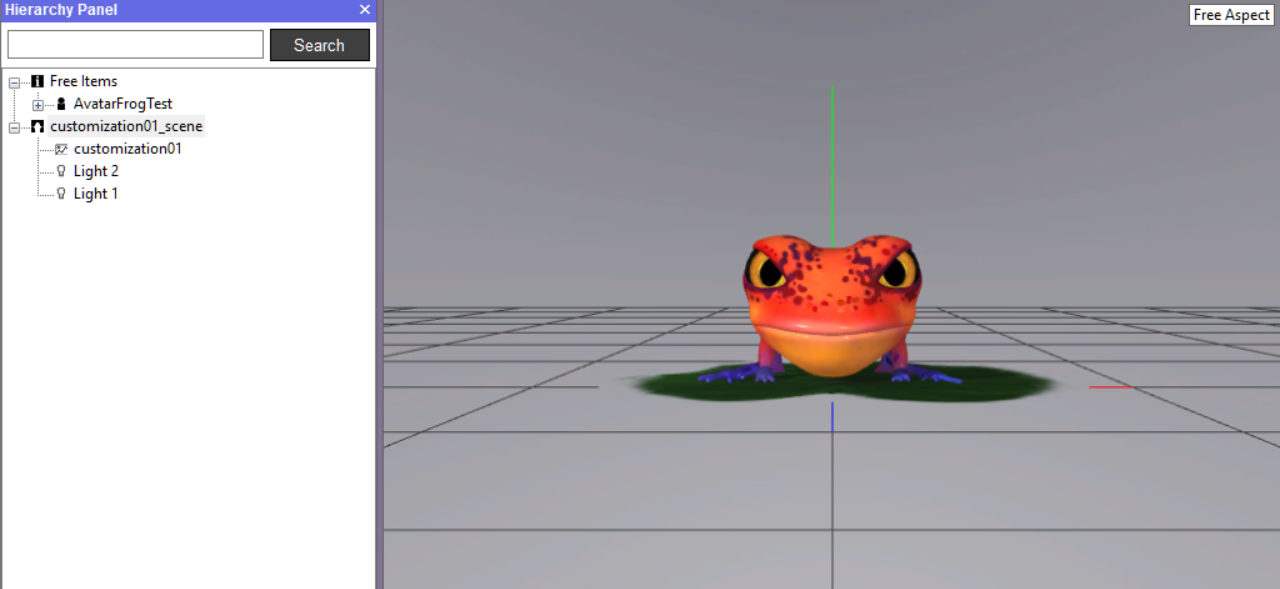
By default, you will have a scene loaded called customization01_scene and an avatar called AvatarFrogTest.

The Animaze Editor will, at all times, have a single loaded scene item. This scene will serve as a container for a lot of data, including all background related information.
This scene is what you will export to the Animaze app when you are done.
Step2: Clear (delete) the current scene.
In the Hierarchy panel Right-click the customization01_scene item and select Remove Item from the right-click menu. This will clear the scene and allow you to build a new one that you can bundle and export later (the customization01_scene is not by default bundle-able/exportable, and that is why you need to delete it).
A DefaultScene will auto-replace the deleted scene. This is your blank slate.
It is a good idea to rename and save your new scene now with a custom name. To do that, right-click on the DefaultScene item and select Save Item As, give it a name (for the purpose of this tutorial let’s assume you have named it podcastStudio_scene).

Step3. Load the Background 2D Image in the Scene01 Scene.

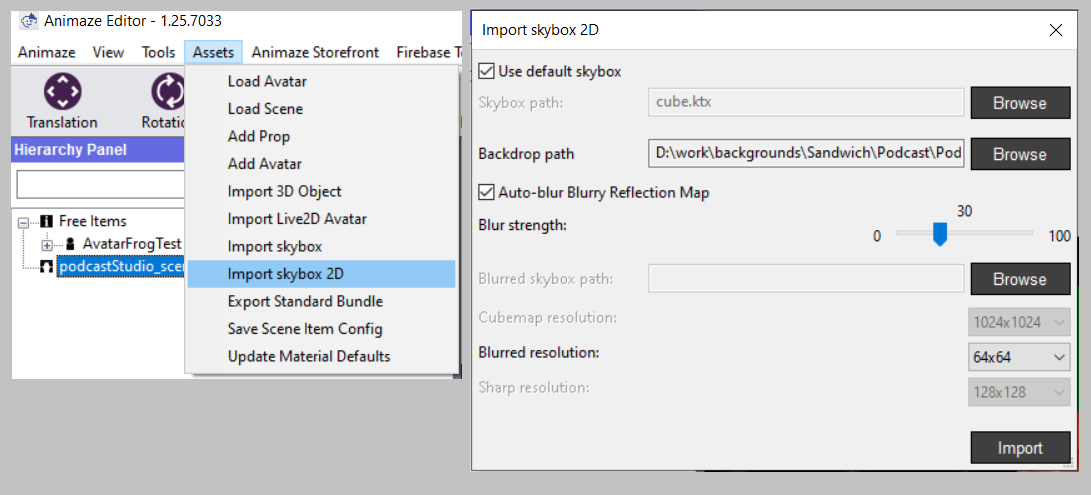
Go to Assets top menu > Import SkyBox 2D. In the import window that pops you need to fill:
- your Simple Backdrop 2D image > goes in the Backdrop Path field. This is the most important input field for you if you want to create a simple 2D Background. If you don’t want to worry about reflection cubes at all, then all the other fields are almost non-important.
- a Skybox HDR texture will be needed in SkyBox Path to serve as a source for creating the backdrop’s reflections cube-maps. If you are unfamiliar with these terms and don’t care much for reflection cube maps, you can choose to skip this by ticking the Use default skybox checkbox, and then your background will use some generic reflection maps.
- you can also check Auto Blur Blurry Reflection map if you do not want to specify a custom blurry reflection map hdr source. If you do want to provide one, you can do so in the Blurred Skybox Path field.
- you can leave the other 3 fields about cube resolutionson with their default values (unless you are knowledgeable about reflection cube sizes and you have a clear idea on why you would want to stray from the defaults).
After pressing Import, in the Hierarchy Panel, a new 2D backdrop type object will be created that references your Background image. It will appear under Free Items, and its name will be copied from the 2D image filename.
You need to Drag&Drop this 2D backdrop type object from Free Items in the Scene category (podcastStudio_scene).

Optional: Load the Overlay Image.
Now that the backdrop is loaded, you can also load an overlay image (with transparency).
Navigate to:

- righ-click scene > add > attach new 2d overlay
- write an appropriate name (in our case, ‘Microphone’), hit ok
- select the ‘Microphone’ item from the hierarchy
- in the editor panel on the right, click on the no texture square
- select the desired 2d file
- hit ok
Set Up Light Values
If you plan on using 3D models with your background, you will likely also want to have a decent dynamic light setup. If you are using mostly 2D assets, you can get away with not worrying about lights too much.
A typical Animaze Light setup would have
- Ambient light information:
- Overall Ambient Light Color,
- Overall Ambient Color intensity
- Six individual light colors (radiating off the six sides of an imaginary infinite size cube encompassing the scene)
- Up to 4 individual Dynamic lights (1 Directional and the rest of three would be Omni or Spot)
In order to create this lighting set-up for your background:
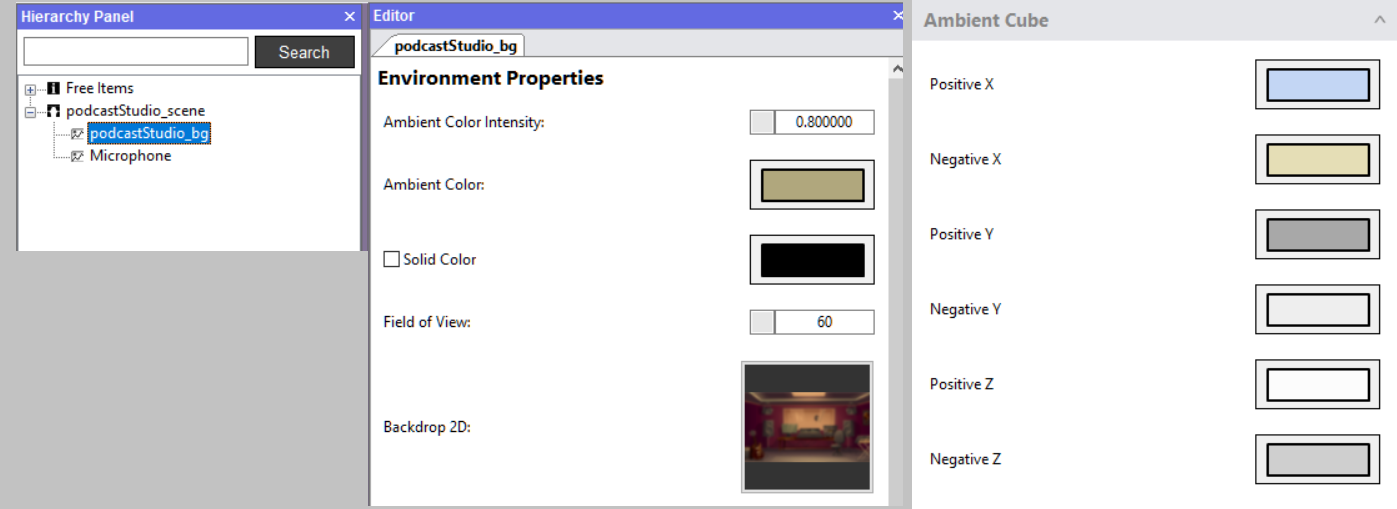
1. Left-click on the imported background object to have it selected. The details for Environment Properties will be displayed in the Editor Panel, in the right side. Here you can set the Ambient Color, Ambient Color Intensity, and the six Ambient Cube lights.

After setting the Ambient light, you need to set the directional dynamic light.
2. Right-click on the scene name (Scene01), click on Attach New Light. The new light will show up in the Hierarchy Panel, as a sub-object of the Scene01 object. Select it and then set the light properties in the Editor Panel.

TIP: It is recommended that you do not set up more than two dynamic lights, because you want to have some let over for special effects (the maximum number of dynamic lights supported by Animaze is 4).
3. Save your work
If you want to be able to come back and do edits to your background, you might want to save this in the Resources folder of the Animaze Editor.
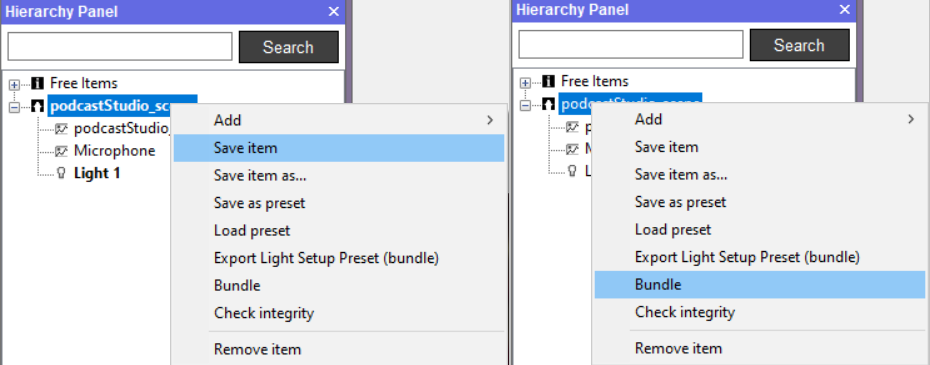
To do so, right-click on the scene > Save Item. Your scene will be saved in the Resources subfolder of the Animaze editor install folder.

4. Export everything in a *.avatar file (bundle), to load in the Animaze app.
To do so right-click on the scene > Bundle. Your *.avatar bundle will be saved in the location of your choosing.
That's it!
